Deleting On Premises EUM v4
|
Published
Follow the below steps to decommission EUM v4:
- Keep a note of the SQL database Connection String
- Remove EUM as Trusted Identity Provider from the On Premises SharePoint server
- Stop the EUM Site
- Delete the EUM Folder from Server
- Delete the EUM Website from IIS
- Delete the Application Pools
- Delete the SQL database
Keep a note of the SQL Database Connection String
The SQL Database for EUM is normally named EUM_Manage Users. To find the Connection String, you can visit the server where EUM is installed.
- Login to the server where EUM is installed, go to the IIS, select the EUM site, right click, and select Explore
- You will be taken to the EUM folder. Open the Extranet_API_V4 and then the file Web.config as Notepad++ or Notepad
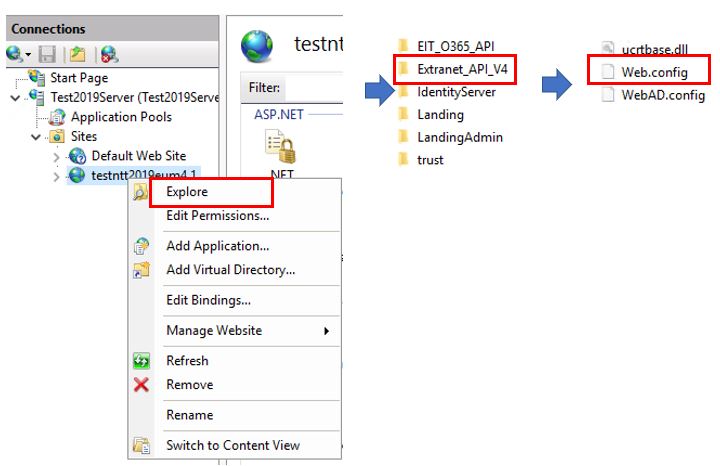
- Lookout for Manageusers.ConnectString, and the value of this will have the connection siring to the SQL Database

- Keep a note of the Connection String
Remove EUM as Trusted Identity Provider from the On Premises SharePoint server
- Login to the SharePoint Server
- In Central Admin (Application Management | Manage web Applications) under Authentication
Providers: Un-Check the box for the new provider. (On the Application that you were using it).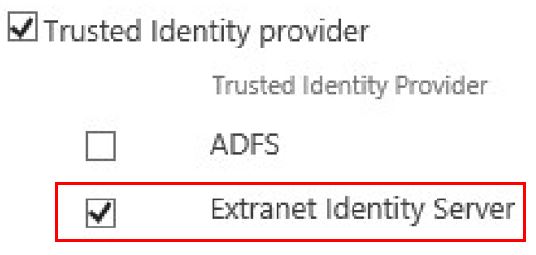
- Remove the EUM as a trusted Identity Token Issuer from SharePoint. Follow the Microsoft Document for this: Remove-SPTrustedIdentityTokenIssuer
Stop the EUM Site
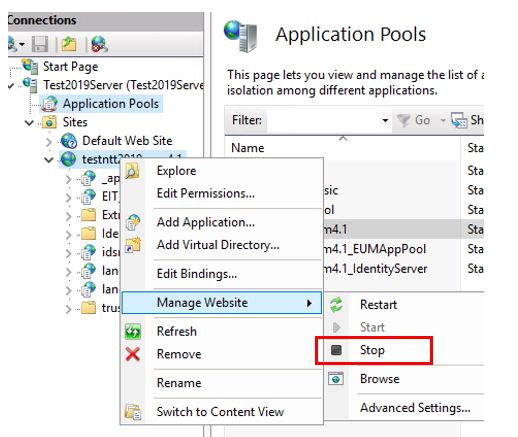
- Login to the server where EUM is installed, go to the IIS, select the EUM site, right click, and expand Manage Website. Select Stop.
Delete the EUM Folder from the server
- Login to the server where EUM is installed, go to the IIS, select the EUM site, right click, and select Explore
- You will be taken to the EUM folder. Go back one level in the folder structure, so you can delete the EUM folder.

Delete the EUM Website from IIS
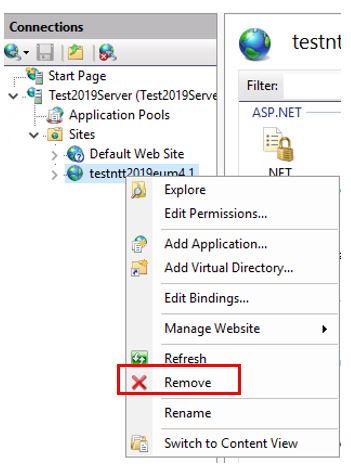
- Login to the server where EUM is installed, go to the IIS, select the EUM site, right click, and select Remove
Delete the Application Pools
- Login to the server where EUM is installed, go to the IIS, select the Application Pools
- Select the three EUM related Application Pools, and delete these one by one.
Select each Application Pool, right click, and select Remove

Delete the SQL Database
- Delete the SQL Database once you have logged into the SQL Server following the Connection String noted in earlier steps