Add Custom Domain to EUM V6 or V7
By default, EUM Admin and EUM Portal URLs are structured like: https://appservicename.azurewebsites.net, where appservicename is the name of the EUM App Service hosted in Azure.
Adding a custom domain would change the URL to a more friendly one, something like: https://portal.mydomain.com, where portal.mydomain.com is a custom domain for the EUM Portal.
If Envision IT is hosting your EUM websites, we will work with you to have the custom domains added. However, if you are hosting the EUM websites, then follow the below process to add a custom domain to EUM V6 or V7.
- Get the CNAME and TXT Value for the Custom Domain
- Make DNS Entries with the CNAME and TXT Values Obtained
- Add the Custom Domain to the EUM Admin and/or EUM Portal App Services
- Generate Free Azure SSL or Import Your SSL Certificate in PFX Format
- Bind SSL to the Custom Domain
- Change Configurations in the EUM App Registrations within Azure AD and EUM Config SharePoint Site
Get the CNAME and TXT Value for the Custom Domain
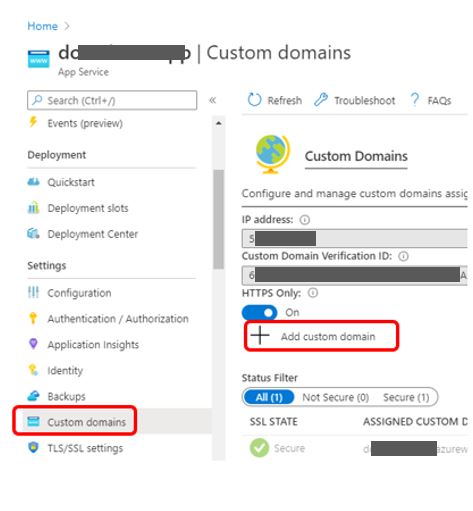
- In the App Service left-hand menu, click Custom Domains. This will open the Custom Domains tab.
- In the Custom Domains tab, click + Add custom domain. This will open a details tab.
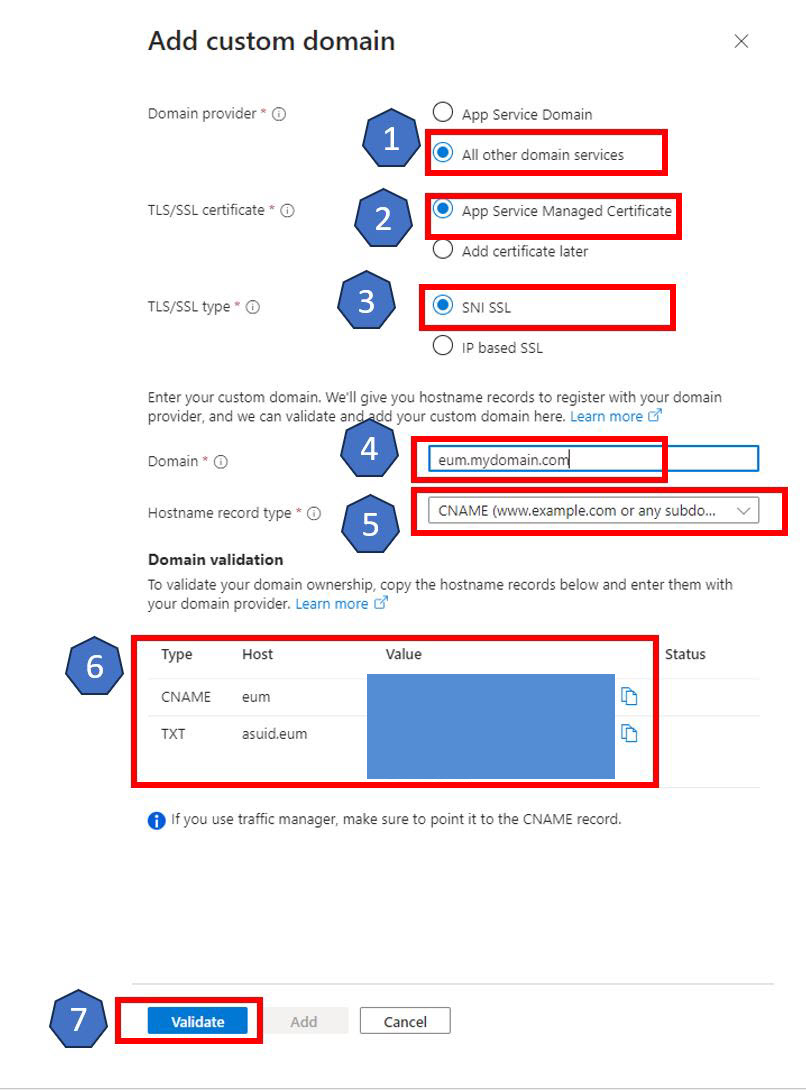
- In the details tab:
- For Domain Provider, select "All other domain services" if you are not purchasing the domain from Azure.
- For TLS/SSL certificate, select "App Service Managed Certificate" to make use of the free SSL Certificate that Azure provides for you. This is recommended as it eliminates the work of uploading a new certificate upon expiry of the current one. If you want to make use of a wildcard SSL certificate instead, select "Add certificate later".
- For TLS/SSL type, select "SNI SSL".
- For Domain, put in the custom domain without https at the beginning.
- For Hostname record type, select "CNAME".
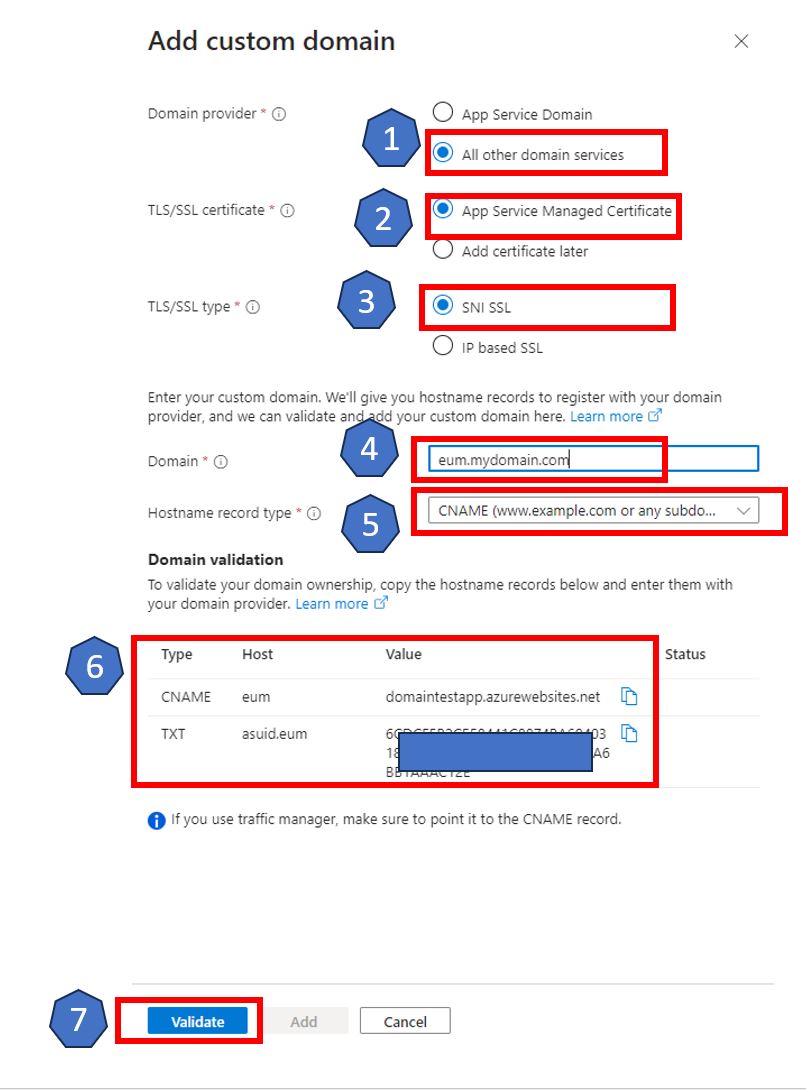
- At this point, Azure will display the CNAME and TXT Values. Keep a note of these.
- Select Validate.
Make DNS Entries with the CNAME and TXT Values Obtained
- Add the CNAME and TXT values obtained in the earlier steps to your DNS.
Add the Custom Domain to the EUM Admin and/or EUM Portal App Services
- In the App Service left-hand menu, click Custom Domains. This will open the Custom Domains tab.
- In the Custom Domains tab, click + Add custom domain. This will open a details tab.
- In the details tab:
- For Domain Provider, select "All other domain services" if you are not purchasing the domain from Azure.
- For TLS/SSL certificate, select "App Service Managed Certificate" to make use of the free SSL Certificate that Azure provides for you. This is recommended as it eliminates the work of uploading a new certificate upon expiry of the current one. If you want to make use of a wildcard SSL certificate instead, select "Add certificate later".
- For TLS/SSL type, select "SNI SSL".
- For Domain, put in the custom domain without https at the beginning.
- For Hostname record type, select "CNAME".
- At this point, Azure will display the CNAME and TXT Values.
- Select Validate.
- Because the DNS entries are already made, the validation will pass and the Add custom domain button will be enabled. Click Add custom domain.
-

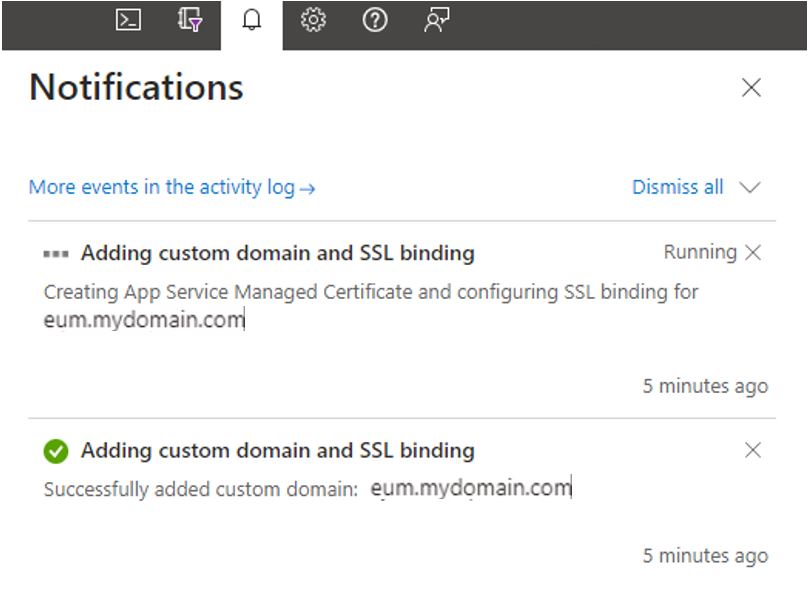
- If you selected App Service Managed Certificate, then at this point the certificate will be generated and the binding is done. The process may take some time. To check the progress, you can click the bell icon in the top right of the browser.
Generate Free Azure SSL or Import Your SSL Certificate in PFX Format (Optional)
Normally, if an Azure App Service Managed Certificate is selected as an option while adding the Custom Domain, this step is done automatically by Azure. Or if you want to make use of a wildcard SSL certificate instead of an Azure App Service Managed Certificate, select "Add certificate later" when adding the Custom Domain. For both of these scenarios, you can follow the steps below, otherwise they can be ignored.
Azure provides free SSL Certificate for Azure App Services. To make use of that, follow the related FAQ at the bottom of the page.
Alternatively, if you already have an SSL in .pfx format, you can import it to the EUM Portal and/or EUM Admin App Services.
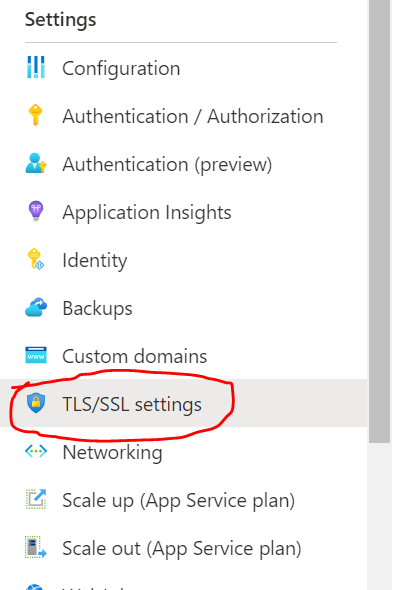
- In the App Service, go to the TLS/SSL Settings from the left-hand menu. It could also be displayed as "Certificates" instead of TLS/SSL settings.
- Go to the Bring your own certificates (.pfx) tab and click Add Certificate.
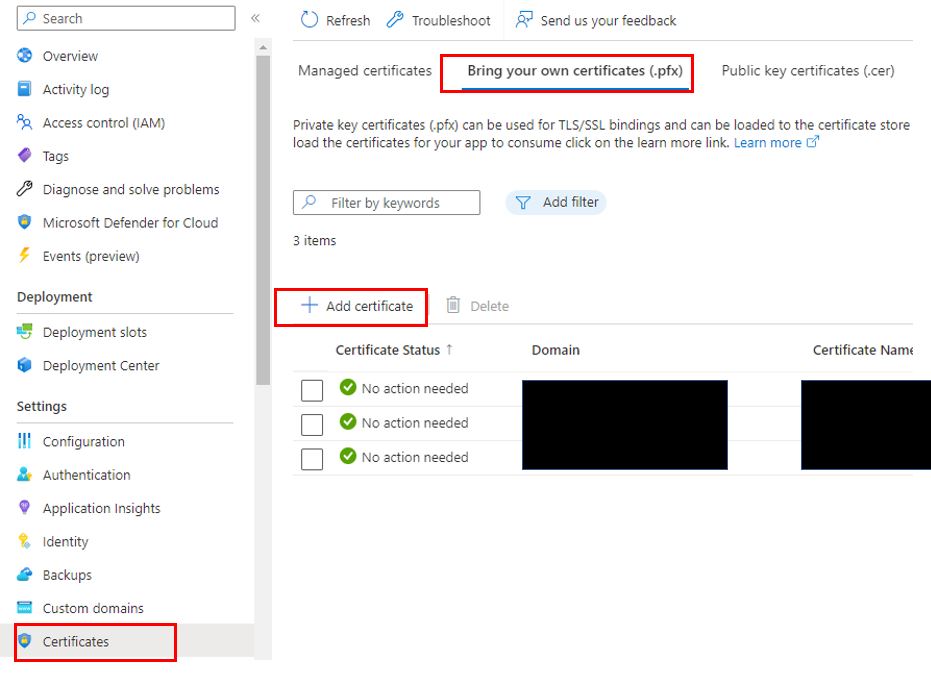
- Browse to the certificate and upload it.

Bind SSL to the Custom Domain (Optional)
If you want to make use of a wildcard SSL certificate instead of an Azure App Service Managed one, and you selected "Add certificate later" while adding the Custom Domain, follow this step. Otherwise, the following steps can be ignored.
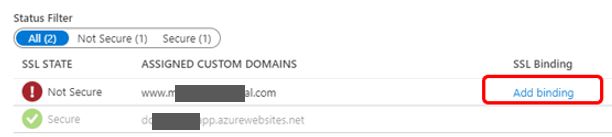
- Go back to the Custom Domains page and click Add binding for the custom domain.
- Select the SSL certificate from the dropdown in the dialog box, and click Add Binding.
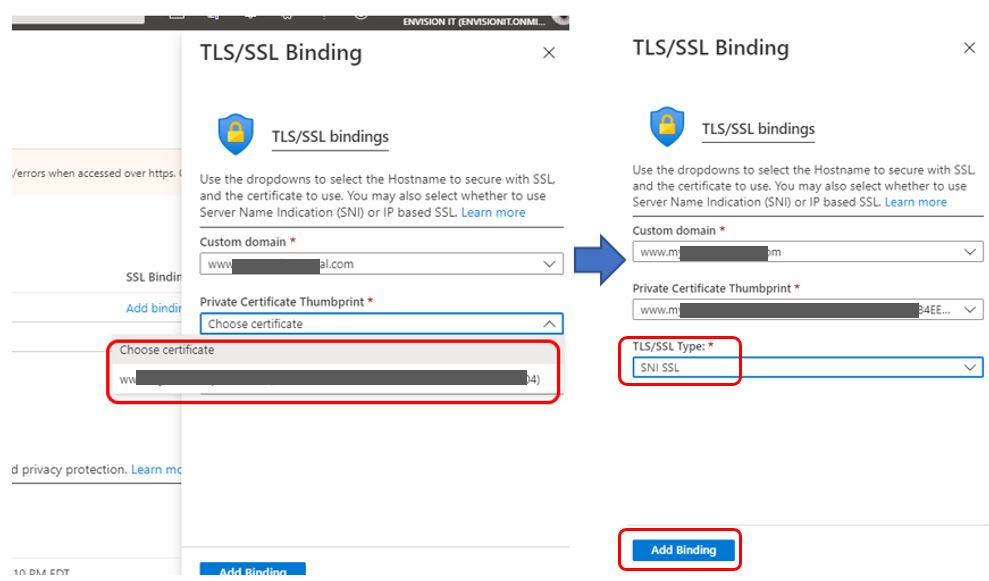
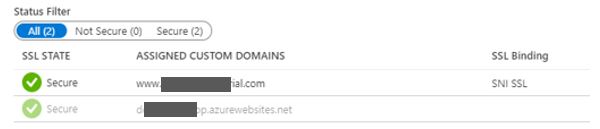
- Notice that the custom domain now shows Secured and the App Service URL in the Overview tab changes to the custom domain.
Change Configurations in the EUM App Registrations within Azure AD and EUM Config SharePoint Site
In order for the Azure AD login to EUM Admin to work properly, the new custom domain and SSL routing needs to be added to the EUM Admin App Registration.
- Go to Azure Active Directory in the Azure portal.
- Go to App registrations.
- Search and select the xxx_EUM_Admin App registration just created, where xxx is the App Service name EUM was installed.
- Go to Authentication.
- Select Add URI and add the new App Service URL as the URI.
- Save the App Registration.
The Admin and Portal URLs are stored in the Suite Config list in the EUM SharePoint site collection. These should be updated to reflect the new URLs. Once updated, the App Services for both Admin and Portal should be restarted in the Azure portal.
Related Microsoft Documents
Add and Manage TLS/SSL Certificates