The Traffic Light Protocol: Simplifying Sensitivity Labels in Microsoft 365
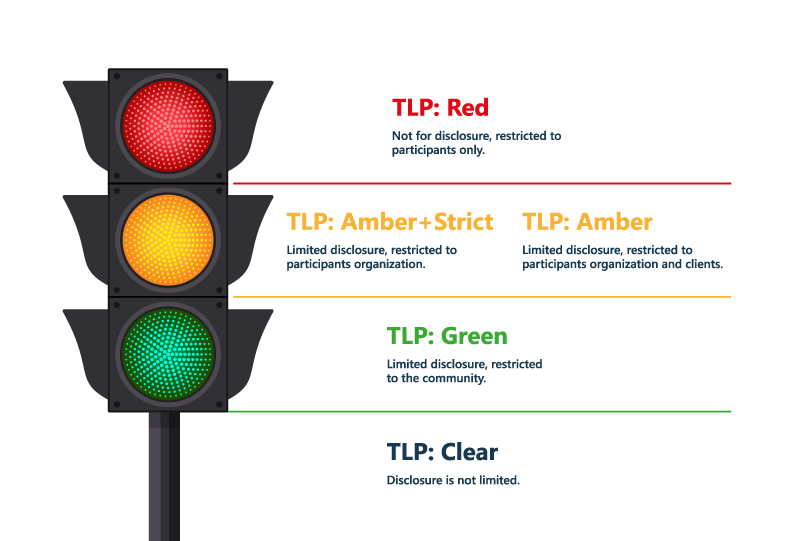
The Traffic Light Protocol (TLP) is a system for classifying sensitive information created in the early 2000s by the UK Government's National Infrastructure Security Co-ordination Centre, in order to encourage greater sharing of sensitive information. It is also being championed in the US by the Cybersecurity and Infrastructure Security Agency (CISA).
I first discovered the concept while researching Microsoft Purview Information Protection. I came across Alexander Fields' great post Adopting the Traffic Light Protocol (TLP) with Microsoft 365's Sensitivity Labels. Given our focus on external sharing in Microsoft 365, I’ve written this article with that specifically in mind. Let’s start by understanding the base TLP. It consists of easy to remember names and colours to indicate sensitivity. In our case, we’re going to be applying those labels to both containers and documents in Microsoft 365, but we’ll get to that.

Multi-Factor Authentication
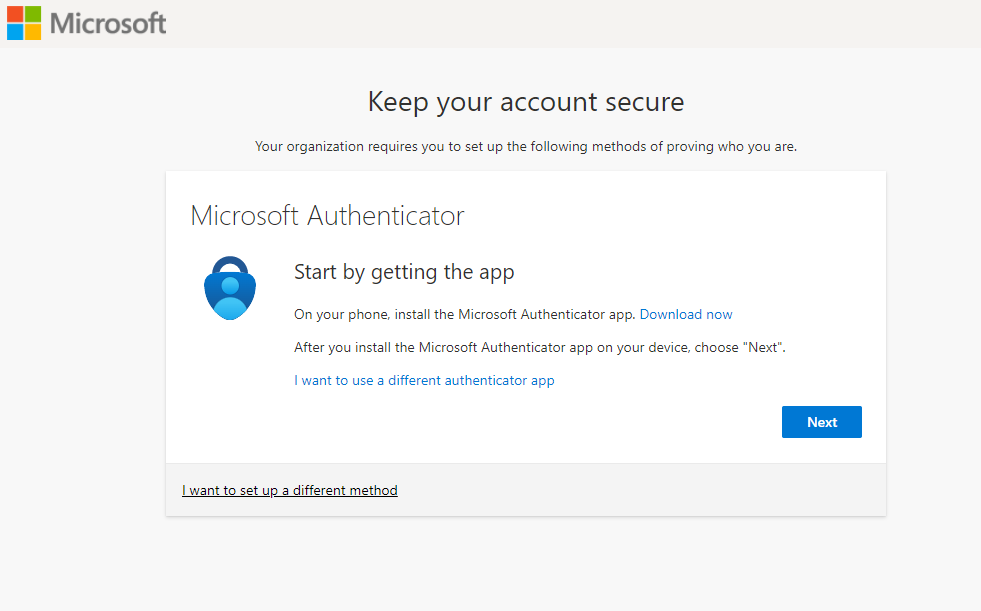
Multi-Factor Authentication (MFA) is an additional layer of security that requires users to verify their identity with more than one piece of evidence before accessing a system or a resource. MFA typically combines something the user knows (such as a password), something the user has (such as a phone or a token), and something the user is (such as a fingerprint or a face scan). MFA can prevent unauthorized access even if someone's password is compromised, and it can enhance the protection of sensitive data and systems.

Requiring MFA for guest access to Microsoft 365 significantly improves security, but it can also present a barrier to entry for guests that are unfamiliar with it. We recommend balancing the need for MFA with the sensitivity of the content being accessed, which we’ll explore further.
Document Encryption
For highly sensitive documents, document encryption can be applied to add another level of protection. Encrypted documents can have very granular permissions applied, defining who can view, edit, save, print, or copy content. Content marking can also be used to apply custom headers, footers, and watermarks to content.
TLP and External Access in Microsoft 365
Below is a suggested implementation of TLP for defining external (guest) access in Microsoft 365.
| TLP | External Access | Guests Require MFA | Document Encryption | M365 Member Licensing |
| Red+Strict | No | N/A | Yes | E5 |
| Red | Yes | Yes | Yes | E5 |
| Amber+Strict | No | N/A | No | E3 |
| Amber | Yes | Yes | No | E3 |
| Green | Yes | No | No | E3 |
| Clear | Yes | No | No | N/A |
- Strict protocols are for content that is not to be shared outside the organization, so external access is not permitted
- Red and Amber protocols can be accessed by guests, but those guests need to go through MFA to access the content
- Red documents are also encrypted to further protect them, both in Microsoft 365 and also when downloaded and stored outside of Microsoft 365
- Green and Clear content can be accessed by guests without going through MFA and no encryption is applied
Microsoft Purview
Microsoft Purview is a unified data governance service that helps organizations discover, catalogue, and classify data across their hybrid data estate. It enables data consumers to find trustworthy and relevant data sources, and data owners to ensure compliance with data policies and regulations. One of the key features of Microsoft Purview is information protection, which allows data owners and administrators to apply sensitivity labels to their data assets based on predefined or custom policies. In our discussion, the sensitivity labels are the TLP labels, and the assets we will be focusing on are SharePoint sites (containers) and the documents in them.

Licensing and Applying Labels
Microsoft licensing is never a simple topic, and Purview is no exception. A few good resources to help navigate this are:
- Microsoft Compliance and Information Protection Licensing Guide
- All About Microsoft Purview Sensitivity Labels
- Microsoft 365 Licensing
The simple version is that users require Office 365 E3 or above to apply a label manually, while automatic policy-driven application of labels requires Office 365 E5, Microsoft 365 E5, or Microsoft 365 E5 compliance licenses. Automatic is a broad term and involves assigning a default sensitivity label for a SharePoint document library or using a workflow to apply a label.
Where this manual versus automatic discussion becomes important is primarily when we are focused on labels applied to documents rather than sites, so let’s dig into the differences there.
Container (Site) Labels
With Microsoft Purview enabled in your tenant, labels can be applied during or after creation of Microsoft Teams, Microsoft 365 groups, and SharePoint sites. Label settings can be applied to control the following:
- Privacy (public or private) of team sites and Microsoft 365 groups
- External user access
- External sharing from SharePoint sites
- Access from unmanaged devices
- Authentication contexts
- Prevent discovery of private teams for users who have this capability
- Shared channel control for team invitations
- Default sharing link for a SharePoint site (PowerShell-only configuration)
- Site sharing settings (PowerShell-only configuration)
- Default label for channel meetings
See the Microsoft Learn article Use Sensitivity Labels with Microsoft Teams, Microsoft 365 Groups, and SharePoint Sites.
The key settings we’ll be focused on are external access and sharing, and authentication contexts.
File Labels in SharePoint and OneDrive
SharePoint and OneDrive have built-in support for Office files and PDF files. Once configured, SharePoint and OneDrive are able to process the contents of Office and PDF documents that have been encrypted by using a sensitivity label. This allows coauthoring, eDiscovery, data loss prevention, search, and other collaborative features to work.
Because files are encrypted, labels can control access and apply content marking regardless of where the files are located. Even when downloaded from SharePoint or OneDrive, the files retain their encryption and protection settings.
Access control for labelled files is very granular. Labels can define who can view, edit, save, print, or copy content. These permissions can be assigned to all users and groups in your organization, any authenticated users, or specific users, groups, email addresses, or domains.
Purview content marking is a feature that allows administrators to apply visual markings to files that have been labelled with sensitivity labels. These markings can include headers, footers, and watermarks that display the label name, classification, or other information. Purview content marking helps to deter unauthorized sharing or leakage of sensitive data by making the label visible on the file.
Authentication Contexts
An authentication context is a set of conditions that must be met before a user can access a resource or perform an action. Authentication contexts can be used to enforce different levels of security depending on the sensitivity or risk of the resource or action. For example, an authentication context can require a user to provide additional factors of authentication, such as a one-time password or a biometric, or to use a compliant device that meets certain security standards. Authentication contexts can also be based on the location of the user, such as requiring a user to be within a certain geographic area or network.
MFA
This authentication context requires a user to provide a second factor of authentication, such as a code sent to their phone or email, or a fingerprint scan, in addition to their username and password. This can increase the security of the user's account and prevent unauthorized access in the case of credential theft or phishing.
Device Compliance
This authentication context requires a user to access a resource or perform an action from a device that meets certain security requirements. This can include having encryption enabled, antivirus software installed, or the latest patches applied. This can reduce the risk of malware infection, data leakage, or remote exploitation of the device.
Device Location
This authentication context requires a user to be within a specified geographic area or range, such as a country, a city, or a radius around a point. This can prevent access from users who are in restricted or high-risk locations, or who are using proxy servers or VPNs to mask their real location.
Purview Implementation Phase One
For our recommended phase one implementation of Purview Information Protection for external guests, we’re going to focus on Green and Amber sensitivity. These are the simpler levels to implement, as the licensing is more common (E3) and we are just focused on container level labelling.
Repeating the table from above, we’ve highlighted the changes in the Red protocol, where we are not ready to do document encryption yet, so no external access is permitted to those documents. Depending on preference, you could choose not to implement the Red protocols during this phase, or they could be defined and available for tagging, but not yet fully implemented.
| TLP | External Access | Guests Require MFA | Document Encryption | M365 Member Licensing |
| Red+Strict | No | N/A | Yes | E5 |
| Red | No | N/A | Yes | E5 |
| Amber+Strict | No | N/A | No | E3 |
| Amber | Yes | Yes | No | E3 |
| Green | Yes | No | No | E3 |
| Clear | Yes | No | No | N/A |
The main steps to be completed are:
- Define the container level sensitivity labels in Microsoft Purview.
- Define the authentication context for each label.
- Build the conditional access policies to allow access from members and guests as appropriate.
- Inventory and label the existing sites.
- Update the sharing rules for each site to correspond to its sensitivity label.
Purview Implementation Phase Two
In the second phase of the implementation, we are going to target the implementation of the Red labels which require document encryption. While these can be manually applied by E3 licensed users, we typically recommend E5 licensing to allow auto-labelling and default labels.
In this phase the main steps are:
- Define the container and document level sensitivity labels in Microsoft Purview.
- Determine the appropriate access controls and document marking rules.
- Set the default label rules based on the container labels.
- Configure Azure Information Protection and Azure Rights Management.
- Apply the default labels to the existing content.
- Create the additional authentication contexts and conditional access policies.
Comments, thoughts, or questions? Please join the dialog in the LinkedIn post.