AAD Privileged Identity Management: Use Time Based and Approvals with High-Privileged Account
Security Best Practices: Using Time-Based Restrictions and Approvals for Activation of High Privilege Accounts
When engaging with our clients, security and the following best practices are always a top priority. A typical engagement always means that we use a dedicated client and project site in our Microsoft 365 (M365) tenant to collaborate with our clients and to share information in an efficient and streamlined fashion. We provide our clients with guest access using our Extranet User Manager product, to ensure that all project related information is readily available 24/7.
More often than not, our clients also provide us with access credentials into their Production M365 tenants with admin privileges, which begs the question: how do we use these elevated admin privileges only when absolutely necessary? Not only is this very important for us as an organization from a liability and compliance point of view, but this also helps to promote security best practices and minimize the risk for our clients.
Azure AD (AAD) Privileged Identity Management to the Rescue
Effective identity management of all users accessing resources on an organization's M365 platform is of paramount importance. System administrators must utilize all tools at their disposal to ensure that users have access to only the resources they need, when they need it. This is where AAD privileged identity management comes into the picture. Among its most important features is the ability to assign Azure AD roles to a particular account and to control the activation of these roles through an approval process that ensures admin are aware at all times of who has access to what and with what level of privileges.
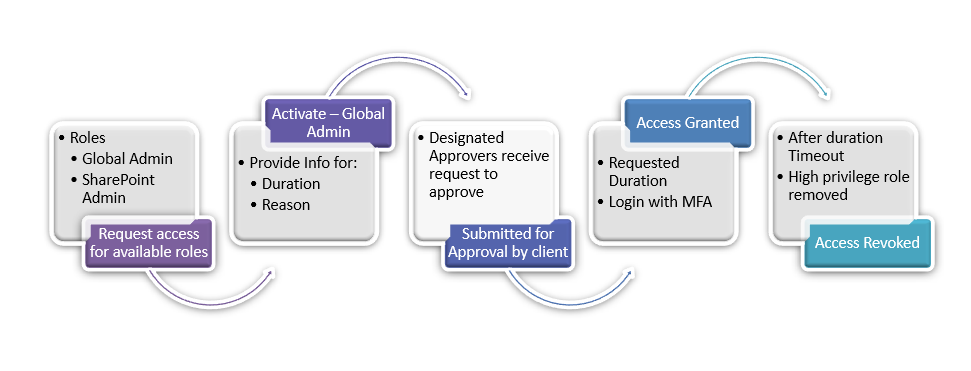
The following is a Privileged Identity Management workflow example that illustrates the high-level workflow involved in requesting access for assigned account roles.
Prerequisites
For the successful configuration of AAD Privileged Identity Management, one of the following licenses is required:
- Azure AD Premium P2
- Enterprise Mobility + Security (EMS) E5
The following is a brief guide on how to set up a global admin account such that it is requested, approved, and activated only when needed for essential admin tasks. This practice can be used for many types of roles but our focus for this article centres around global admin privileges; for a full set of features check out this Microsoft article.
Setting Up Time Limited Temporary Privileges Access: Administrator Tasks
The following is a step-by-step guide on how to set up global access privileges on a time-limited basis with an approval process. Activation requests are sent to configurable administrators for approval. User accounts should have already been provisioned in Azure AD.
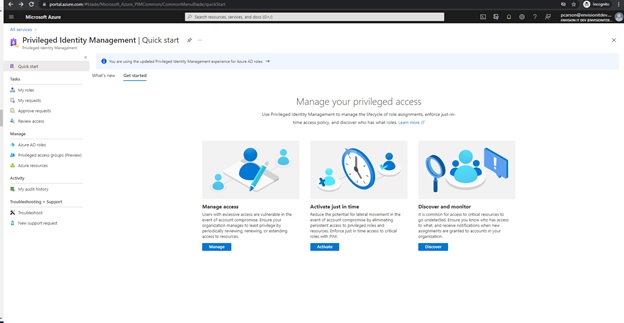
- Login to portal.azure.com with an existing global admin account
- Click on "All Services"
-
Search for "Azure AD Privileged Identity Management"
-
Click on "Azure AD roles"
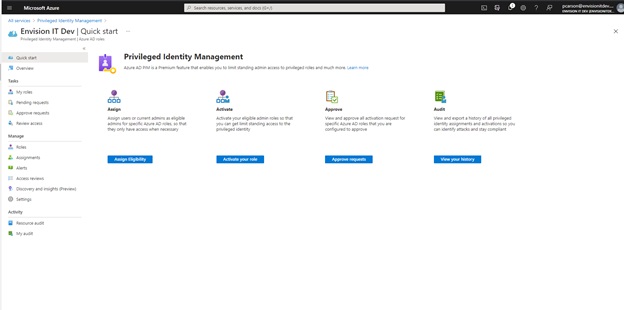
- Click on "Assign Eligibility"
-
Search for "Global Administrator" in the "Search by role name" search box and select
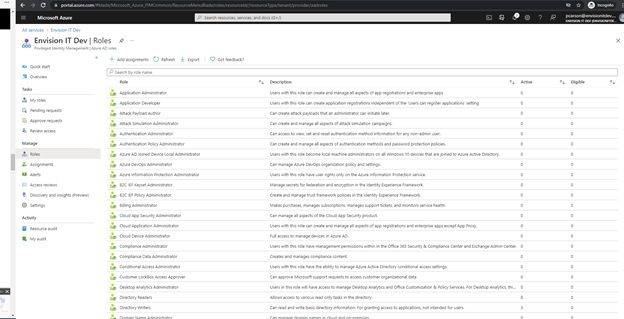
- Click "Add assignments"
-
Select members
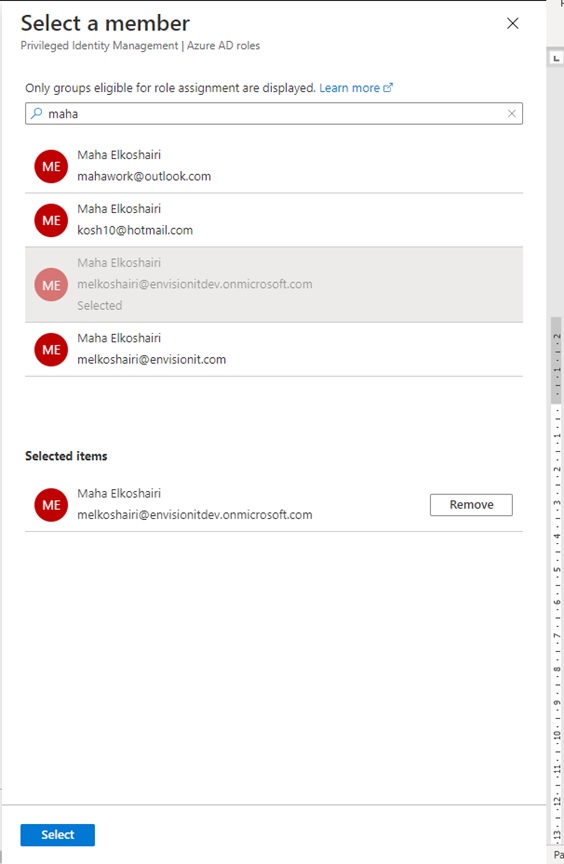
-
The following screen appears:

- Click Next
- "Assignment type" will be "Eligible"
- And confirm the "Permanently eligible" checkbox is checked
-
Click Assign

- The user will appear under the "Eligible assignments"
- Now select "Settings"
-
Click "Edit"
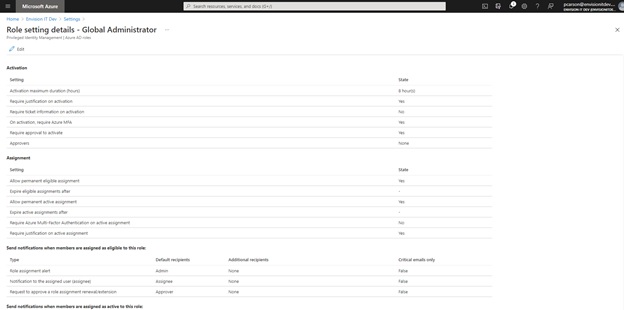
-
Under "Activation", select the "Require approval to activate" checkbox

- Click "Select approvers" and select the approvers
- Click "Select" and then "Update"
User Tasks - Request Account Activation
- Login to portal.azure.com
- Navigate to All Services > Privileged Identity Management
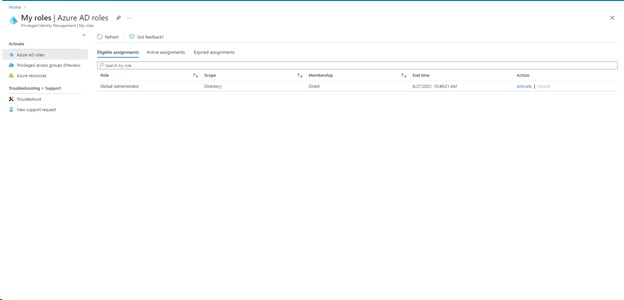
- My roles
- An assignment for global admin will be displayed
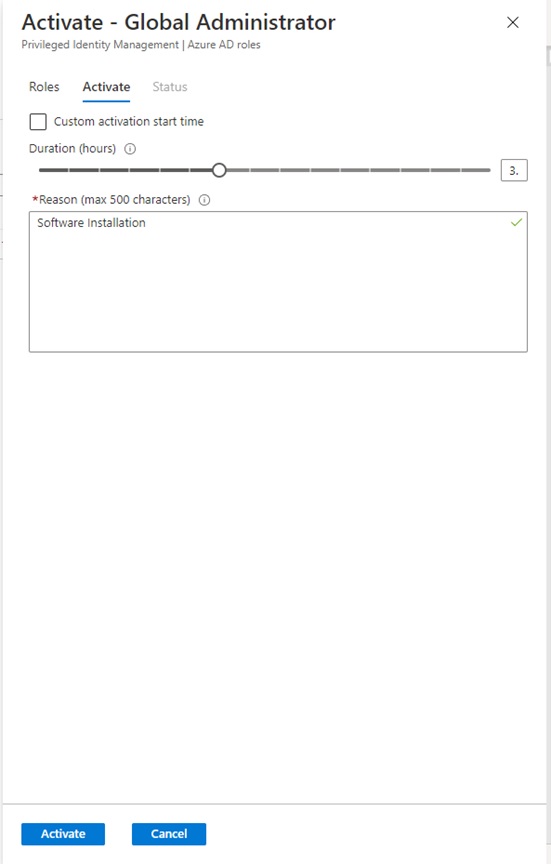
- Click activate
- Set the duration of the assignment (up to 8 hours)
- Enter a reason for the session
- Click the activate button
- A notification will appear with the title "Your request is pending approval"
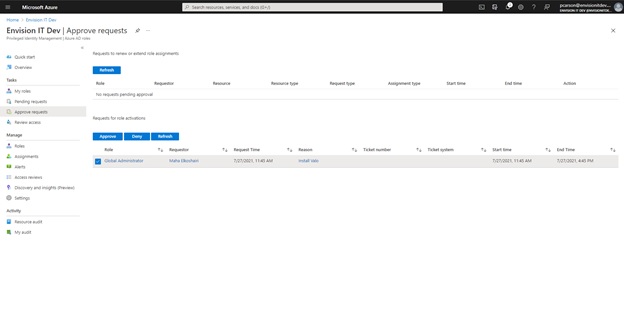
Administrator Tasks - Approve Requests
- Login to portal.azure.com
- Navigate to All Services > Privileged Identity Management
- Click on approve requests
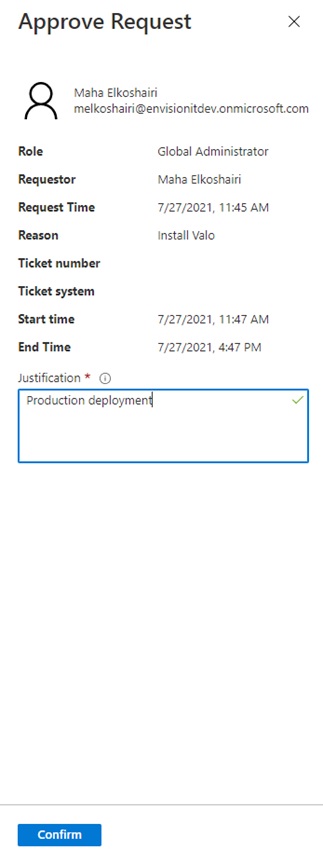
- Under requests for role activation, click approve
- Enter a justification in the approval request screen
- Click the confirm button
Subscribe to Modern Work Monthly
Get the latest Microsoft 365 + Copilot insights to help your teams work smarter, faster.
We respect your inbox. Unsubscribe anytime.